


Hi RingCentral Community!
Are you eager to get your new deskphones but overwhelmed by the process? Don’t worry, we’ve got you covered! Our Assisted Setup is designed to get your deskphones up and running in no time.
Here’s a quick check list to ensure everything goes smoothly:
- Check compatibility: Before setting up your deskphone, ensure it supports the RingCentral Assisted Setup option by checking the list of our Certified and supported deskphones.
- Verify number assignment: If you purchased your deskphone from us, ensure that the deskphone has been assigned a local number or DigitalLine.
- Confirm availability of deskphones from another provider: If the deskphones that you have come from a different provider, check that it’s unlocked before you proceed. Contact the provider to find out if it’s unlocked or how to unlock it.
Once you’ve checked off everything on the checklist, you’re ready to proceed with the assisted setup steps:
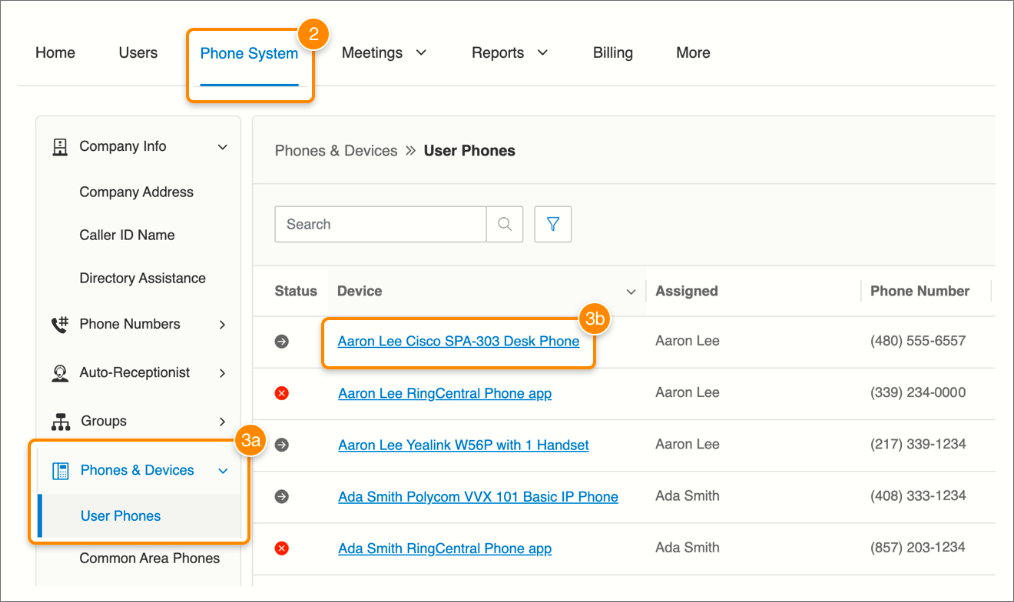
- Sign in to the Admin Portal.
- Click the Phone System tab in the top menu.
- In the left panel, click Phones & Devices > User Phones (a), then select an existing deskphone from the list (b).
Note: If you need to add an existing phone, go to Add an Unassigned Phone.
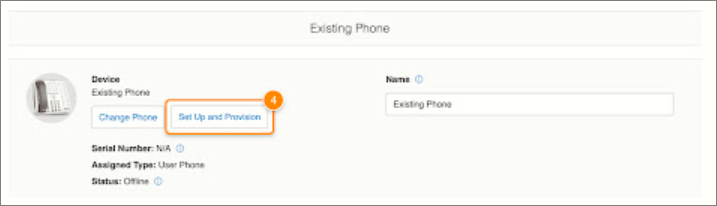
- Click Set Up & Provision.
- Enter the brand name or model of your deskphone in the search bar, then select it from the dropdown.
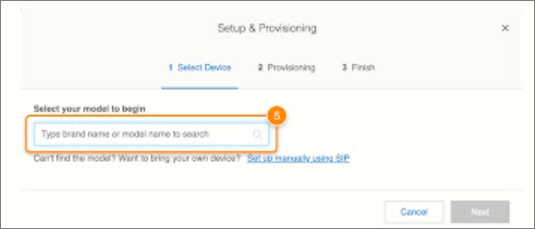
- Click Next.
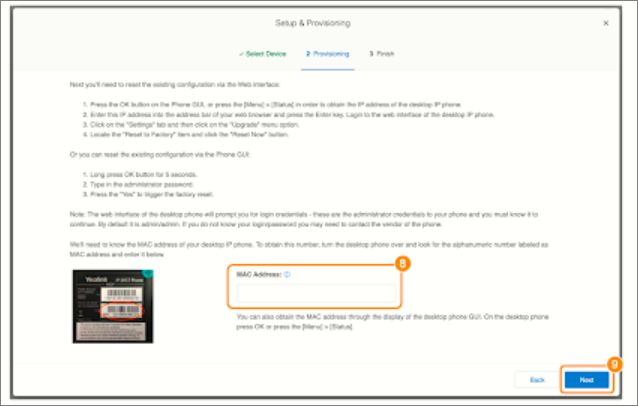
- Locate the MAC Address on your phone (or IP Address on a Cisco phone). Some devices call this a Serial Number. It will be a 12-digit alphanumeric number on a label on the underside of the phone.
- In the Setup & Provisioning window, enter the MAC Address (or IP Address on a Cisco phone).
- Click Next.
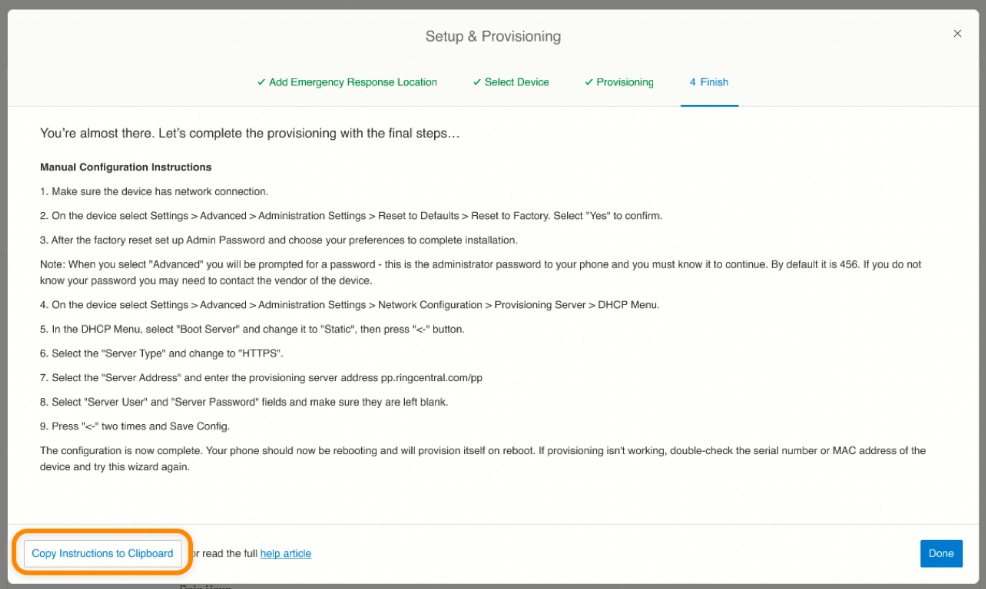
- Follow the on-screen instructions to finalize your phone's setup. You can copy the instructions to your clipboard so they’re easy to access.
- When you’ve completed all the steps, click Done.
After your deskphone restarts, it will automatically connect to RingCentral’s system, download any necessary updates, and be fully operational.
Having trouble? Let us know by commenting below or sending us an email at community.support@ringcentral.com